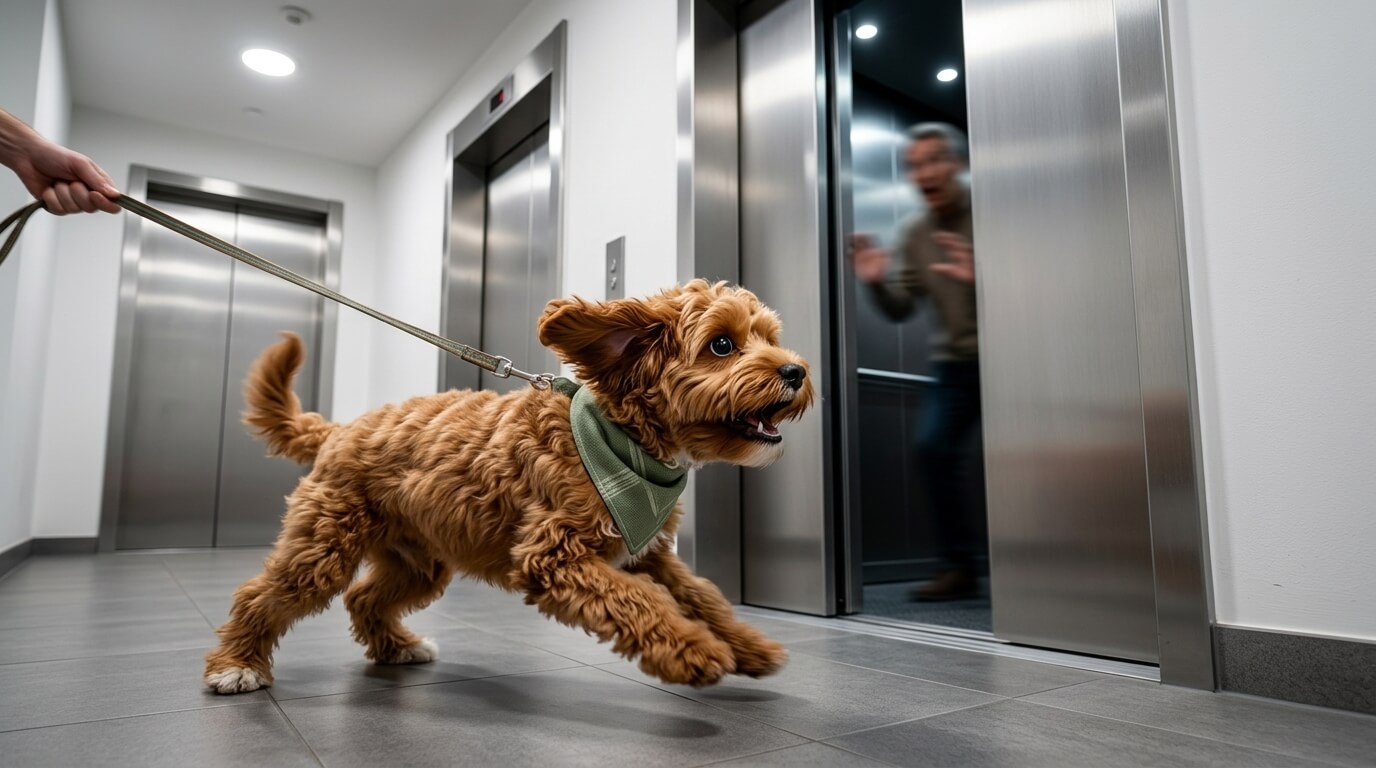
Dog lunging at elevator door openings is one of the highest-pressure apartment behavior problems. The doors open, a dog, person, stroller, cart, or child appears, and there may be only a few feet to react safely.
This is not just an etiquette issue. Lunging in a tight elevator lobby can lead to leash burns, falls, neighbor complaints, scary dog-to-dog encounters, or a bite risk. The goal is to create distance, predictability, and a trained exit plan before the door opens.
This page is narrower than the general dog elevator training guide. Use that page for broad elevator manners. Use this one when the specific problem is lunging, barking, or rushing at the elevator door when it opens.
Dog Lunging at Elevator Door: Quick Answer
To reduce dog lunging at elevator door openings, stop standing directly in front of the doors, create distance, teach a U-turn cue, reward calm waiting away from the threshold, and practice with easy elevator sounds before real high-traffic moments. Use management first: short leash, safe distance, body position, and an exit plan. If your dog redirects, bites, panics, or cannot recover, work with a qualified trainer or behavior professional.
| Elevator Problem | Likely Cause | First Safety Move |
|---|---|---|
| Lunges when doors open | Surprise trigger | Stand to the side, not center |
| Barks at dogs inside | Reactivity or frustration | U-turn away before escalation |
| Rushes into elevator | Impulse and habit | Wait cue away from door |
| Freezes then explodes | Fear or conflict | Add distance and skip crowded rides |
| Redirects onto leash or handler | Over threshold | Get professional help |

Table of Contents
Why Elevator Doors Trigger Lunging
Elevator doors are a surprise box. Your dog may hear a chime, feel tension on the leash, watch a narrow gap open, and suddenly see another dog or person appear at close range. There is little time to sniff, turn, or create space.
Dogs may lunge for different reasons. Some are scared and want the trigger to move away. Some are frustrated because they want to greet. Some are territorial in the building. Some are startled by the door motion. Some have practiced rushing through the threshold so often that it has become a habit.
The fix depends on the cause, but the first rule is the same: do not place your dog directly in front of a closed elevator door and hope for the best.
Step 1: Change Your Waiting Position
Most elevator lunging gets worse because the dog is standing squarely in front of the doors. When the doors open, the trigger is instantly close and unavoidable.
Instead, wait to the side with your dog behind or beside you, several feet from the doors if space allows. Keep the leash short enough for safety but not tight enough to add tension. Your body should create a visual barrier without trapping the dog.
If the lobby is too small to create space, wait farther down the hall until the elevator arrives. You do not have to stand at the threshold to use the elevator.
Step 2: Teach a U-Turn Before You Need It
A U-turn cue gives you an emergency exit when the elevator opens to a trigger your dog cannot handle. This cue should be trained away from the elevator first.
- Say a cheerful cue such as “this way.”
- Turn 180 degrees.
- Drop a treat near your leg as your dog turns with you.
- Practice in quiet hallways.
- Use it before your dog lunges, not after they are already airborne.
The U-turn is not failure. It is good handling. In apartment buildings, skipping one elevator ride is often the safest training choice.
Step 3: Desensitize the Chime and Door Movement
Some dogs react before they even see the trigger. The elevator chime, motor, light, or door movement predicts surprise. Practice at a distance where your dog can still eat and think.
When the chime sounds or the door moves, mark and reward your dog for staying with you. If your dog stiffens, lunges, or barks, you are too close or the session is too hard. Move away and make the next repetition easier.
This is where desensitization and counterconditioning principles matter: make the trigger easier, pair it with good things, and progress slowly.
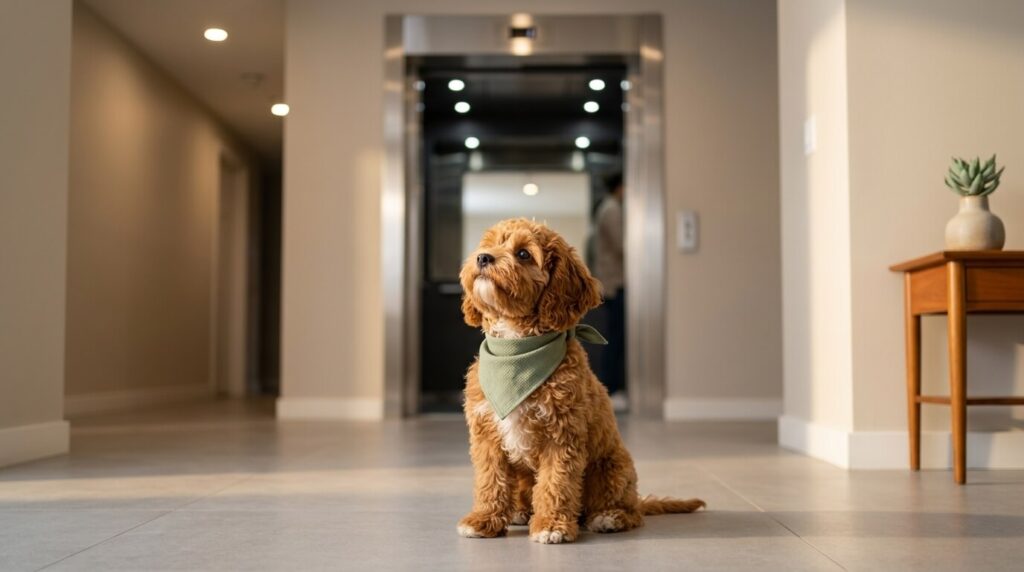
Step 4: Train a Wait Zone
Create a predictable waiting spot. It might be a mark on the wall, a hallway corner, or a rug outside your unit. The dog learns that elevator time starts away from the door, not at the threshold.
Practice when the lobby is quiet. Walk to the wait zone, reward calm standing or sitting, then walk away. Later, add elevator sounds. Later still, add opening doors from a safe distance.
Do not demand a sit if your dog is too stressed to sit. Calm standing with four paws on the floor is enough for many reactive dogs.
Step 5: Use Door-Open Rules
When the elevator opens, pause. Look first. If the elevator is empty and your dog is calm, enter. If there is a dog, stroller, child, crowded group, or trigger your dog cannot handle, step away and wait for the next ride.
Teach yourself this rule too: your dog does not need to enter every elevator that opens. Safety beats convenience.
Step 6: Practice Controlled Repetitions
Real elevator traffic is unpredictable, so build easy practice first. If possible, practice at low-traffic times. Reward calm waiting, looking at you, turning away, and walking past the elevator without entering.
Do not train during rush times if your dog is still struggling. Too many hard repetitions can make lunging stronger.
Step 7: Add a Recovery Routine
Even with training, surprise moments happen. Your dog needs a recovery routine after a hard elevator encounter: move away, breathe, scatter a few treats, go outside if needed, or return to the apartment for a reset.
Do not lecture, yank, or keep testing after a bad reaction. Once your dog is over threshold, learning is limited. Reset and make the next setup easier.
Elevator Trigger Ladder
| Level | Trigger | Training Goal |
|---|---|---|
| 1 | Quiet hallway away from elevator | U-turn and treat scatter |
| 2 | Elevator visible but inactive | Calm wait zone |
| 3 | Chime or door sound at distance | Look back to handler |
| 4 | Empty elevator opens | Wait before entering |
| 5 | Person inside elevator | Calm choice or U-turn |
| 6 | Dog inside elevator | Skip ride safely |
Most reactive dogs should not start at level 6. If you only train during surprise dog encounters, your dog never gets easy practice.
What to Do When Another Dog Is Inside
If the door opens and another dog is inside, do not squeeze in. Step away, use your U-turn, and wait for the next elevator. Even friendly dogs can create problems in a tight metal box.
If the other owner tries to exit, give space. Move your dog behind you, turn away, and keep the leash organized. Avoid face-to-face greetings at elevator thresholds. Doorways and narrow spaces are poor greeting locations.
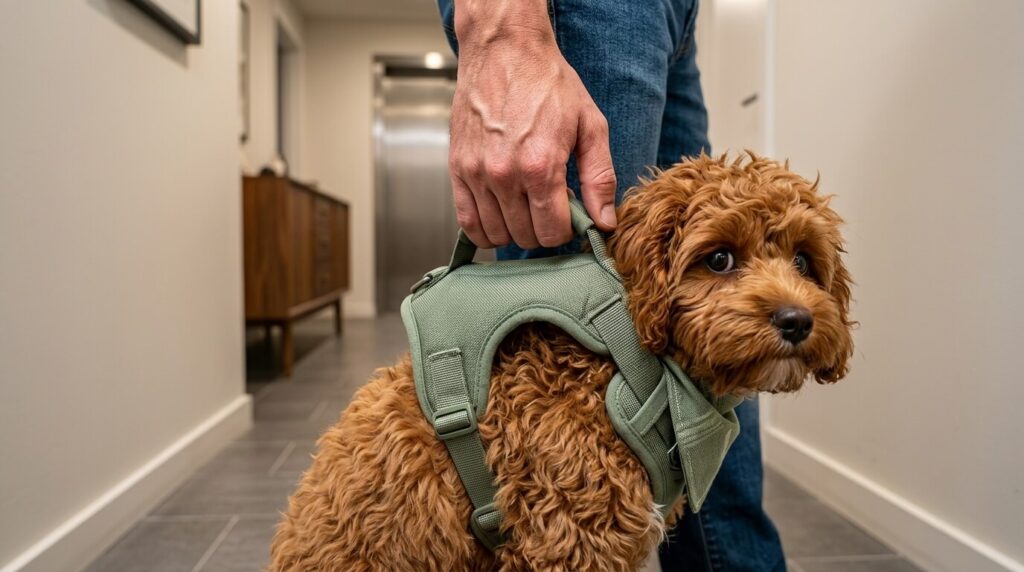
Small Dog Handling
Picking up a small dog can sometimes prevent a collision, but it can also increase fear or make the dog feel trapped. If your small dog relaxes when carried and there is immediate safety risk, lifting may be useful. If your dog panics, snaps, or becomes more reactive in arms, use distance and barriers instead.
Practice carrying calmly away from triggers before relying on it in the lobby. Never scoop a dog suddenly while they are already lunging unless safety requires it.
7-Day Elevator Door Safety Plan
This plan is for dogs who can still take food and recover between repetitions. If your dog is already over threshold in the hallway, start farther from the elevator or work with a professional.
Day 1: Map the Lobby
Stand in the lobby without your dog and notice the safest waiting spots. Where can you stand without blocking traffic? Where can you move if the doors open to another dog? Which times are busiest? A good plan begins before the leash is in your hand.
Day 2: Practice U-Turns Away From the Elevator
Use a quiet hallway. Say your cue, turn, and reward. Practice until your dog follows smoothly without leash pressure. This should feel like a game, not an emergency drill.
Day 3: Visit the Wait Zone During Quiet Times
Walk to the chosen waiting spot, reward calm behavior, and leave. Do not wait for an elevator yet. You are teaching your dog that the lobby can be boring.
Day 4: Add Elevator Sounds at Distance
If the chime or motor sound happens, reward your dog before they react. If your dog stiffens or stares, move farther away. Distance is information, not failure.
Day 5: Watch an Empty Elevator Open
Only do this at a quiet time. Stand to the side, reward calm, and do not enter if your dog gets tense. The goal is calm observation.
Day 6: Practice Skipping a Ride
When the elevator arrives, use your U-turn and walk away even if it is empty. This teaches both you and your dog that leaving is a normal option.
Day 7: Try One Easy Ride
If the week has gone well, take one easy ride during a low-traffic time. Keep it short. Reward calm waiting, entering, exiting, and moving away from the door.
Real Apartment Scenarios
The Door Opens to a Dog
Do not negotiate in the doorway. Say your U-turn cue and move away. If the other owner exits, keep your dog behind you and create as much space as the lobby allows. Avoid leash tangles and face-to-face greetings.
The Elevator Is Crowded
Skip it. A crowded elevator gives a reactive dog no room to recover. Waiting for the next ride is not rude; it is responsible handling.
A Neighbor Wants to Pet Your Dog
Use a short, polite script: “We’re training around elevators, so we need space.” You do not need to explain the whole behavior history in the lobby. Practice the sentence before you need it.
Your Dog Lunges Before You Can Move
Get distance first. Do not try to train in the explosion. Once your dog is away from the door, use a treat scatter or calm movement to help them recover. Later, make the setup easier.
You Are Carrying Groceries
Do not train hard elevator moments when your hands are full. If your dog is reactive, prioritize handling safety: shorter leash, less clutter, and lower-traffic times when possible.
Handler Positioning Matters
Your body position can prevent half the problem. Stand between your dog and the elevator doors when possible, but do not trap your dog against a wall. Keep your shoulders turned slightly away from the doors so moving away is easy.
Think of your leash as a seatbelt, not a steering wheel. A tight leash held straight toward the doors can build tension. A short but relaxed leash, with your dog beside or behind you, gives you more control without adding as much pressure.
If your dog is large or strong, practice this positioning in an empty hallway. The first time you learn your footwork should not be when the doors open to another dog.
Progress Signs
Progress may be subtle. Look for these changes before expecting a perfect elevator ride.
- Your dog can wait farther from the door without pulling forward.
- Your dog hears the chime and looks back to you.
- Your dog can U-turn before barking or lunging.
- Your dog recovers faster after a surprise.
- Your dog can skip a ride without escalating.
- Your leash feels looser in the lobby.
- You feel less rushed because you have a plan.
These signs matter because elevator reactivity is a safety behavior. A dog who can move away calmly is already safer, even before they can handle every possible trigger.
Match the Fix to the Reason
Fear-Based Lunging
A fearful dog may lean away, tuck the tail, freeze, bark sharply, or try to escape after lunging. For this dog, the first fix is more distance and fewer surprise encounters. Do not force the dog to stand close to opening doors for “exposure.” That can make fear worse.
Frustrated Greeting
A frustrated greeter may whine, wag, bounce, and pull toward people or dogs. This dog still needs distance because tight greetings can become unsafe. Reward turning away and give appropriate social outlets outside the elevator context.
Startle Response
Some dogs lunge because the door opens suddenly. These dogs often improve when the chime, light, and door movement become predictable. Practice easy repetitions at quiet times and reward before the startle becomes a lunge.
Learned Door-Rushing Habit
Some dogs rush because they have always been allowed to rush. These dogs need impulse-control routines: wait zone, release word, and calm entry. Keep the training simple and consistent every time.
Maintenance Plan After Improvement
Do not stop the plan the first week your dog improves. Elevator behavior can regress quickly when a surprise dog appears or when you get rushed.
- Keep waiting to the side of the doors.
- Keep rewarding calm chime responses sometimes.
- Skip crowded elevators even after progress.
- Practice U-turns weekly in easy hallways.
- Use quiet times for refreshers after travel, illness, or schedule changes.
- Return to management if your dog has a bad week.
Maintenance is not a sign that training failed. It is how apartment dogs keep safe habits in a building that changes every day.
Small habits protect crowded spaces.
Gear and Handling Basics
Gear does not train the behavior, but poor gear can make elevator lunging dangerous. Use a secure harness or collar setup your dog cannot slip. Keep the leash short in tight spaces, but avoid constant tension. If your dog is strong, practice handling skills before busy elevator times.
If you need help choosing walking equipment for apartment settings, use the best dog harnesses for apartment dogs guide. For severe lunging, ask a professional what equipment is safe for your dog and building.
What Not to Do
Do Not Stand Nose-to-Door
This gives your dog no time or space when the doors open.
Do Not Force Greetings
Elevator thresholds are not socialization zones. Skip greetings in tight spaces.
Do Not Correct After the Lunge
Harsh corrections after the reaction may add stress and do not teach your dog what to do before the door opens.
Do Not Ride Crowded Elevators During Training
If your dog is learning, choose lower-traffic times whenever possible.
Do Not Let Neighbors Pressure You
You are allowed to wait for another elevator. You are allowed to say your dog needs space. Safety is more important than avoiding a slightly awkward moment.
Building Management and Neighbor Etiquette
Apartment behavior is partly training and partly shared-space etiquette. A short, calm plan can reduce tension with neighbors.
- Wait to the side instead of blocking the doors.
- Let people exit before you enter.
- Skip crowded rides without apology.
- Use quiet times for practice.
- Keep your dog close in lobbies and hallways.
- Use clear scripts instead of long explanations.
If your building has repeated complaints, document your training plan and consider getting professional help sooner. Showing that you are managing the issue responsibly can matter in a rental setting.
How to Combine This With General Elevator Etiquette
Once the lunging is safer, broaden the training. Practice waiting for doors, entering calmly, turning around inside the elevator, standing near your leg, and exiting without rushing. That broader work belongs on the main elevator etiquette page.
Do not rush into full etiquette before the door-opening reaction is under control. For a reactive dog, calm distance and a safe U-turn are more important than a perfect sit.
When to Get Professional Help
Get help if your dog has bitten, redirected onto you, injured themselves, pulled you down, cannot recover after elevator events, or reacts intensely to every door opening. Also get help if your building has repeated complaints or safety risk.
A qualified trainer or behavior consultant can help you set up controlled practice. Your veterinarian can help rule out pain, anxiety, or medical issues that may affect behavior.
How This Page Fits the Elevator Cluster
This page is for lunging at elevator doors. The broader dog elevator training page should stay the main elevator manners guide. The future or separate dog scared of elevators page should focus on fear of entering, riding, or hearing elevators.
FAQ
Why is my dog lunging at elevator door openings?
Your dog may be startled, scared, frustrated, territorial, excited, or reacting to surprise close-range triggers. The elevator door creates a sudden reveal with little space.
Is dog lunging at elevator door openings aggression?
Not always. Lunging can come from fear, frustration, excitement, or lack of impulse control. Because it can still be dangerous, manage it seriously.
Should I let my dog meet other dogs in the elevator?
No. Elevators and thresholds are tight spaces. Skip greetings and wait for another ride if needed.
What should I do if the elevator opens and a dog is inside?
Use your U-turn, step away, and wait. Do not force your dog into a close encounter.
Can a harness stop elevator lunging?
A secure harness can improve safety, but it does not train the behavior by itself. You still need distance, cues, and controlled practice.
How long does training take?
It depends on the dog, building traffic, history, and severity. Mild cases may improve with consistent management and practice. Severe cases need professional support and more time.
What if my dog is scared of the elevator itself?
That is a different problem from lunging at door openings. Focus on fear reduction and gradual elevator comfort rather than door-reactivity training alone.
Next Step
On your next elevator trip, change only one thing: stop standing directly in front of the doors. Wait to the side, keep distance, and be ready to U-turn if the door opens to a trigger.
Dog lunging at elevator door openings improves when you stop surprise close-range rehearsals and teach a safer pattern before the doors open.
References
VCA Animal Hospitals: Fears, Phobias, and Anxiety
VCA Animal Hospitals: Desensitization and Counterconditioning