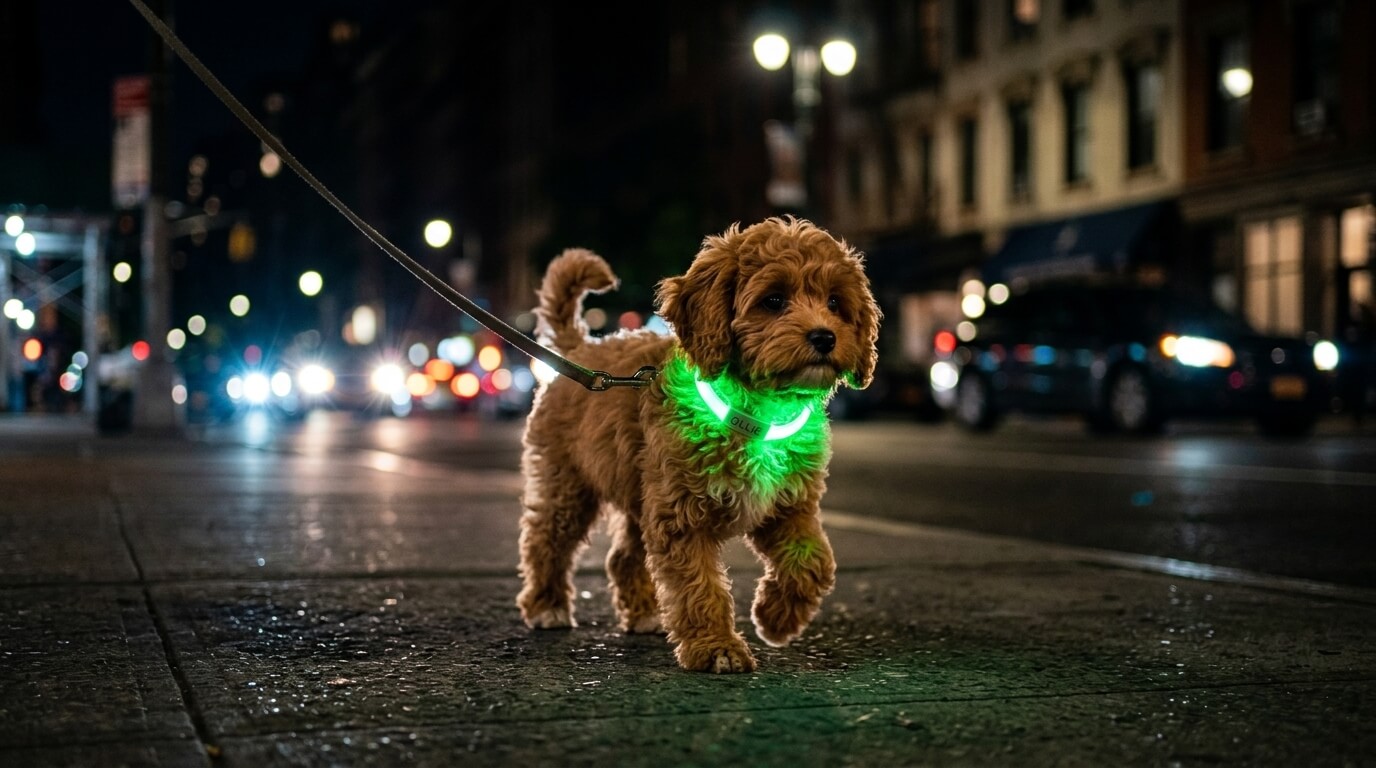
For apartment owners, the useful question is not simply which light is brightest. It is which type of visibility gear fits your dog, your building, and your usual night-walk route. A lighted necklace may work for a short-coated dog, while long fur, a small neck, rain, or a sensitive dog may make a collar cover, clip-on light, or lighted harness a better fit.
Quick answer: compare fit, illumination coverage, light mode, runtime, charging routine, and the manufacturer’s stated water protection. LED gear can make a dog easier to see, but it does not replace a leash, a secure walking collar or harness, identification, route awareness, or visible gear for the person holding the leash.
How We Evaluated These Representative Options
This is a specification-based comparison, not a hands-on ranking. The five options below represent four different gear types: a cut-to-fit LED necklace, a collar cover, clip-on lights, and a lighted harness. Product facts are taken from current manufacturer pages. Where the manufacturer does not publish a value, the comparison says Not specified rather than estimating it.
- Manufacturer specification means a dimension, runtime, charging method, mode, attachment, or water claim stated by the manufacturer.
- Editorial assessment means our interpretation of those specifications for elevators, hallways, parking garages, city sidewalks, storage, drying, and other apartment situations.
- Manufacturer visibility language is identified as a manufacturer claim. Visibility equipment cannot guarantee traffic safety or prevent an accident.
Comparison Matrix
On a phone, swipe horizontally inside the table. Start with gear type and fit, then check runtime, charging, water protection, and the main limitation.
| Product | Visibility Gear Type | Neck / Body Size | Width | Illumination Coverage | Light Modes | Battery | Runtime | Charging Method | Charge Time | Cable Included | Water Rating | Cut-to-Fit / Fixed Size | Attachment Method | Manufacturer Visibility Claim | Apartment Fit | Main Limitation |
|---|---|---|---|---|---|---|---|---|---|---|---|---|---|---|---|---|
| Nite Ize NiteHowl Rechargeable LED Safety Necklace | LED safety necklace | Cut to 12–27 in | Not specified | 360° illumination | Glow / flash | Rechargeable; capacity not specified | 5 hr | USB-C | Approx. 1.5 hr | No | Weather-resistant; no IP rating stated | Cut-to-fit | Slides over the head as an addition to the regular collar | 360° illumination | Simple all-around light for short coats and predictable short routes | Only 5 hr runtime; weather-resistant is not waterproof |
| Nite Ize NiteDog Rechargeable LED Collar Cover | Flexible collar / leash / harness cover | Neck-size range: Not specified | 6.42 in long; fits gear up to 1 in wide | Illuminated strip; not a full 360° collar | Green, blue, red; red flash; Disc-O | Rechargeable; capacity not specified | 7 hr | Micro-USB | Approx. 1.25 hr | No | Weather-resistant; not waterproof | Fixed 6.42 in cover | Micro hook-and-loop tabs | Designed to keep attached gear illuminated; no distance stated | Adds light to gear you already use without becoming the leash attachment | Not a full collar; coverage depends on placement |
| Nite Ize SpotLit Splash | Clip-on collar / harness light | Physical dimensions: Not specified | Not applicable | Single clip-on light; not a 360° collar | Four colors in glow / flash; Disc-O | Rechargeable; capacity not specified | 12 hr | USB-C | Approx. 2 hr | No | IPX7: 1 m for 30 min | Fixed clip-on light | Clips to collar or harness | Manufacturer describes it as keeping dogs seen; no distance stated | Useful for rainy routes and owners who want to keep their regular walking gear | Can swing, face one direction, or be hidden by fur |
| Ruffwear The Beacon | Clip-on dog safety light | Not specified | Not applicable | Visible from all directions per manufacturer | Three colors / three modes | 280 mAh LiPo | Not specified in reviewed source | Micro-USB | Approx. 1.5 hr | Yes | Waterproof to 1 m for 30 min; official page does not state an IP code | Fixed clip-on light | Quick Ring / Quick Clip attachment | Visible from all directions | Compact light for a harness or collar on wet city walks | Runtime is not specified in the reviewed manufacturer source |
| Noxgear LightHound | Lighted safety harness | S–XL; chest 12.5–50 in | Not applicable | 360° body illumination | Six multicolor flashing; eight solid | Rechargeable; capacity not specified | Up to 12 hr | USB-C | Not specified | Yes | Light electronics are not waterproof; remove light unit before washing harness | Four adjustable harness sizes | Adjustable neck and chest straps | 360° visibility up to 1/4 mile (manufacturer claim) | Broad coverage for long hair or dogs whose collar light is easily hidden | Larger storage footprint; electronics require dry handling |
Five Evidence-Checked Representative Options
Nite Ize NiteHowl Rechargeable LED Safety Necklace
Manufacturer specification: NiteHowl is a rechargeable necklace that cuts to fit from 12 to 27 inches. It provides 360-degree illumination in glow or flash mode, runs for up to five hours, and recharges in about 1.5 hours by USB-C. The cable is not included. Nite Ize calls the housing weather-resistant; it does not publish an IP rating or the necklace width.
Editorial assessment: This is the simplest full-circle option for a short-coated dog on predictable evening routes. Measure before cutting and remember that it is visibility gear added to the dog’s normal walking setup, not the leash attachment. Five hours may be enough for short potty trips but gives less buffer if several household members forget to recharge it.
Nite Ize NiteDog Rechargeable LED Collar Cover
Manufacturer specification: The 6.42-inch flexible strip attaches with micro hook-and-loop tabs to collars, leashes, or harnesses up to one inch wide. It offers green, blue, and red, plus red flash and a color-changing Disc-O mode. Runtime is seven hours, and approximate micro-USB charging time is 1.25 hours. The cable is not included. It is weather-resistant, not waterproof, and the manufacturer does not state a dog neck-size range.
Editorial assessment: A cover lets you add light to walking gear whose fit you already trust. Placement matters: one illuminated strip is not the same as a complete 360-degree collar, and long fur or a jacket can block it. It may suit an apartment leash station where the same harness is used for every elevator trip.
Nite Ize SpotLit Splash
Manufacturer specification: SpotLit Splash is an IPX7 clip-on light rated for submersion to one meter for up to 30 minutes. It provides four selectable colors in glow or flash mode plus Disc-O, runs for up to 12 hours, and recharges in about two hours by USB-C. The cable is not included. The reviewed page does not specify physical dimensions.
Editorial assessment: The published water rating makes this a practical representative option for rainy sidewalks or snowy curb trips. It is still a single clip-on light, not a 360-degree collar. Check whether it swings, faces inward, or disappears under chest or neck fur before relying on its placement.
Ruffwear The Beacon
Manufacturer specification: The Beacon uses Ruffwear’s Quick Ring / Quick Clip attachment, cycles through three colors and three light modes, and uses a 280 mAh LiPo battery. The included micro-USB cable charges it in about 1.5 hours. Ruffwear states that it is waterproof to a depth of one meter for 30 minutes and visible from all directions. The current reviewed manufacturer source does not specify runtime or an IP code.
Editorial assessment: This is a compact attachment for owners who want a light on a familiar collar or harness. Because no runtime is published on the reviewed source, do not assume it will cover a specific number of walks. Check its charge before leaving the apartment and keep reflective backup gear near the leash.
Noxgear LightHound
Manufacturer specification: LightHound is a lighted harness available in sizes S through XL for chest girths from 12.5 to 50 inches. It offers six multicolor flashing modes, eight solid-color modes, and up to 12 hours of runtime. A USB-C cable is included; charge time is not specified. Noxgear claims 360-degree visibility up to one-quarter mile. The light electronics are not waterproof and must be removed before the harness is washed.
Editorial assessment: A lighted harness provides broader body coverage when long fur hides a neck light. It also needs more drawer or hook space than a small clip light, and the removable electronics require a deliberate drying routine after wet walks. Treat the distance figure as a manufacturer visibility claim, not a promise that drivers will react in time.
Choose the Gear Type Before the Product
LED Necklace
A cut-to-fit necklace can provide simple all-around light on a short coat. It may be less useful when thick neck fur covers the tube. Measure carefully because cutting is permanent, and use a separate collar or harness designed for leash force.
Collar Cover
A collar cover adds light to equipment your dog already accepts. Check the available mounting width and whether the illuminated strip faces outward after the dog moves, shakes, or wears a coat.
Clip-On Light
A clip light is compact and easy to move between a collar and harness. Its weak point is directional placement: a dangling light can swing, bother a sensitive dog, or disappear behind fur. View it from the front, side, and rear on your real route.
Lighted Harness
A lighted harness offers more body coverage and may remain visible on long-haired dogs. It has a larger storage footprint, must fit the chest correctly, and may require removing electronics before washing or drying.
Apartment Night-Walk Decision Scenarios
Late-Night Potty Walk Through an Elevator
Choose gear you can switch on before the elevator arrives. A compact collar cover or clip light can stay beside the leash, while a necklace or harness may provide broader coverage once outside. Keep the leash short but loose through doors and follow a calm dog elevator routine; the light does not manage surprise encounters for you.
Dim Hallways and Shared Entrances
A steady mode may be easier for people and dogs to interpret in a confined hallway than a rapid flash. Position the light so it does not shine directly into your dog’s eyes or nearby residents. Pause before opening a shared entrance and make the leash connection visible as well as the dog.
Parking Garages, Bikes, and Scooters
Garage exits and city sidewalks contain moving hazards from several directions. Favor coverage that remains visible from the side, but do not treat a distance claim as a reaction-time guarantee. Use a predictable route, avoid blind corners when possible, and make yourself visible too. Solo owners can combine this with a broader night-walk safety plan.
Rain, Snow, and Wet Storage
Match the product to the manufacturer’s exact water statement. Weather-resistant does not mean waterproof. After a wet walk, wipe the gear and let it dry in a ventilated location away from a dog’s mouth before returning it to a drawer, hook, or charging station.
Small Dogs, Long Hair, and Sensitive Dogs
For a small dog, check weight and movement even when the manufacturer does not publish a weight. For long hair, evaluate whether neck-level light disappears and consider a harness or better-positioned clip. If flashing causes freezing, scratching, avoidance, or agitation, switch to a steady mode or a different placement.
Introduce Lighted Gear Without Pressure
- Place the switched-off gear on the floor and reward calm investigation.
- Turn it on across the room before bringing the light near the dog.
- Try a steady mode for a few seconds during daylight.
- Attach or fit it briefly without beginning a walk.
- Use it for one short, familiar evening potty route before a longer outing.
Stop and change the setup if the dog paws at the device, freezes, tries to chew it, or cannot settle. Tiny clip lights can bounce; illuminated tubes can sit close to the eyes; harness electronics can feel unfamiliar. Adaptation should be gradual rather than forced.
Use Three Visibility Layers
- Dog: an LED necklace, collar cover, clip light, or lighted harness that remains visible on the dog’s coat.
- Leash connection: reflective or contrasting gear that helps others understand where the dog and handler connect.
- Human: reflective clothing or a separate light, especially at garage exits and street crossings.
One bright dog attached to an invisible person by a dark leash can still be hard to interpret. Treat LED gear as one supporting layer rather than the entire safety system.
Charging, Cleaning, and Small-Apartment Storage
- Create one leash-and-light station near the door, but keep cables and electronics out of chewing reach.
- Check the charge before the elevator arrives, not after reaching the street.
- Keep simple reflective backup gear available when a battery is low.
- Follow the manufacturer’s water and cleaning instructions; do not treat all five products as equally waterproof.
- Dry wet gear before charging or placing it in a closed drawer.
- Inspect clips, housings, charging covers, straps, and cut edges for damage.
- Remove electronic walking gear after the walk. Do not let a dog chew it or sleep in it unsupervised.
FAQ
Can an LED collar replace a leash or walking harness?
No. Unless a product is specifically designed and rated as the leash attachment, treat it as visibility equipment only. Use a secure collar or harness and current identification.
Is flashing better than a steady light?
Not automatically. The useful setting is one that remains visible without upsetting your dog or distracting people in a confined hallway. Start with steady light if your dog is sensitive.
Does weather-resistant mean waterproof?
No. Use the exact manufacturer language. In this comparison, NiteHowl and the NiteDog cover are described as weather-resistant. SpotLit Splash has an IPX7 rating. Ruffwear states a depth-and-time waterproof claim for The Beacon without publishing an IP code on the reviewed page. LightHound’s electronic light unit is not waterproof.
What works when long fur hides a collar light?
Test the gear from several angles. A higher clip position or lighted harness may remain more visible than a neck tube buried under fur.
Can a dog sleep in LED gear?
Remove electronic walking gear after the walk. This reduces chewing, snagging, pressure, and battery-damage risks and gives wet equipment time to dry.
Official Manufacturer Sources
- Nite Ize: NiteHowl Rechargeable LED Safety Necklace
- Nite Ize: NiteDog Rechargeable LED Collar Cover
- Nite Ize: SpotLit Splash
- Ruffwear: The Beacon
- Noxgear: LightHound
Specifications were reviewed on August 29, 2026. Manufacturers may revise products and instructions, so confirm current fit, charging, and water guidance before purchase or use.